Intro to the Ohio Supercomputer Center (OSC)
And the VS Code text editor

1 Background: a computational infrastructure for genomics
A laptop or desktop computer is often not sufficient to work with large-scale genomics data. Additionally, many of the specialized programs that help you analyze your data can only be run through a “command-line interface”.
Those are some of the reasons that a typical computational infrastructure to do what we may call “command-line genomics” involves the following components:
- A supercomputer — in our case, the Ohio Supercomputer Center (OSC) [this session]
- A text editor — I recommend and will demonstrate VS Code [this session]
- The Unix shell (terminal) [homework and next session]
- R1 for interactive statistical analysis and visualization [homework and Thu + Fri]
We will be using all of these components during this workshop.
This session provides an introduction to high-performance computing in general, and to OSC specifically. In all of the lab sessions at this workshop, we’ll continue to work at OSC, so you will get a fair bit of experience with it.
2 High-performance computing
A supercomputer (also known as a “compute cluster” or simply a “cluster”) consists of many computers that are connected by a high-speed network, and that can be accessed remotely by its users. In more general terms, supercomputers provide high-performance computing (HPC) resources.
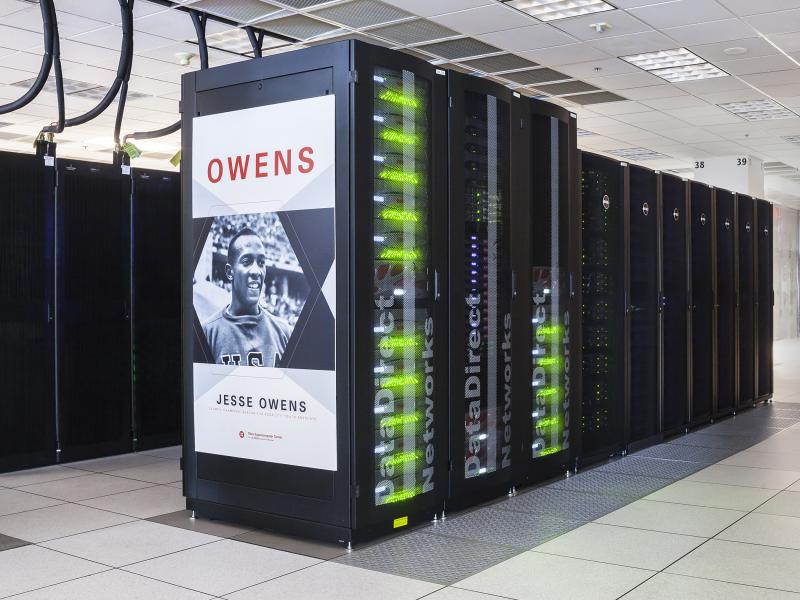
This is what Owens, one of the OSC supercomputers, physically looks like:
Here are some possible reasons to use a supercomputer instead of your own laptop or desktop:
- Your analyses take a long time to run, need large numbers of CPUs, or a large amount of memory.
- You need to run some analyses many times.
- You need to store a lot of data.
- Your analyses require specialized hardware, such as GPUs (Graphical Processing Units).
- Your analyses require software available only for the Linux operating system, but you use Windows.
When you’re working with genomics data, many of these reasons typically apply. This can make it hard or sometimes simply impossible to do all your work on your personal workstation, and supercomputers provide a solution.
The Ohio Supercomputer Center (OSC)
The Ohio Supercomputer Center (OSC) is an HPC facility provided by the state of Ohio. It has two supercomputers, lots of storage space, and an excellent infrastructure for accessing these resources.
Access to OSC’s computing power and storage space goes through OSC “Projects”. For this workshop, we have an educational project called PAS2714. If you want to use OSC for your own research after this workshop, you should ask your PI to create an OSC project for this purpose if you don’t have one already.
OSC has three main websites — we will mostly or only use the first:
- https://ondemand.osc.edu: A web portal to use OSC resources through your browser (login needed).
- https://my.osc.edu: Account and project management (login needed).
- https://osc.edu: General website with information about the supercomputers, installed software, and usage.
3 The structure of a supercomputer center
3.1 Terminology
Let’s start with some (super)computing terminology, going from smaller things to bigger things:
- Core / Processor / CPU / Thread
Components of a computer (node) that can each (semi-)indendepently be asked to perform a computing task like running a bioinformatics program. For our purposes, we can treat these terms as synonyms. - Node
A single computer that is a part of a supercomputer. - Supercomputer / Cluster
A collection of computers connected by a high-speed network. OSC has two: “Pitzer” and “Owens”. - Supercomputer Center
A facility like OSC that has one or more supercomputers.

3.2 Supercomputer components
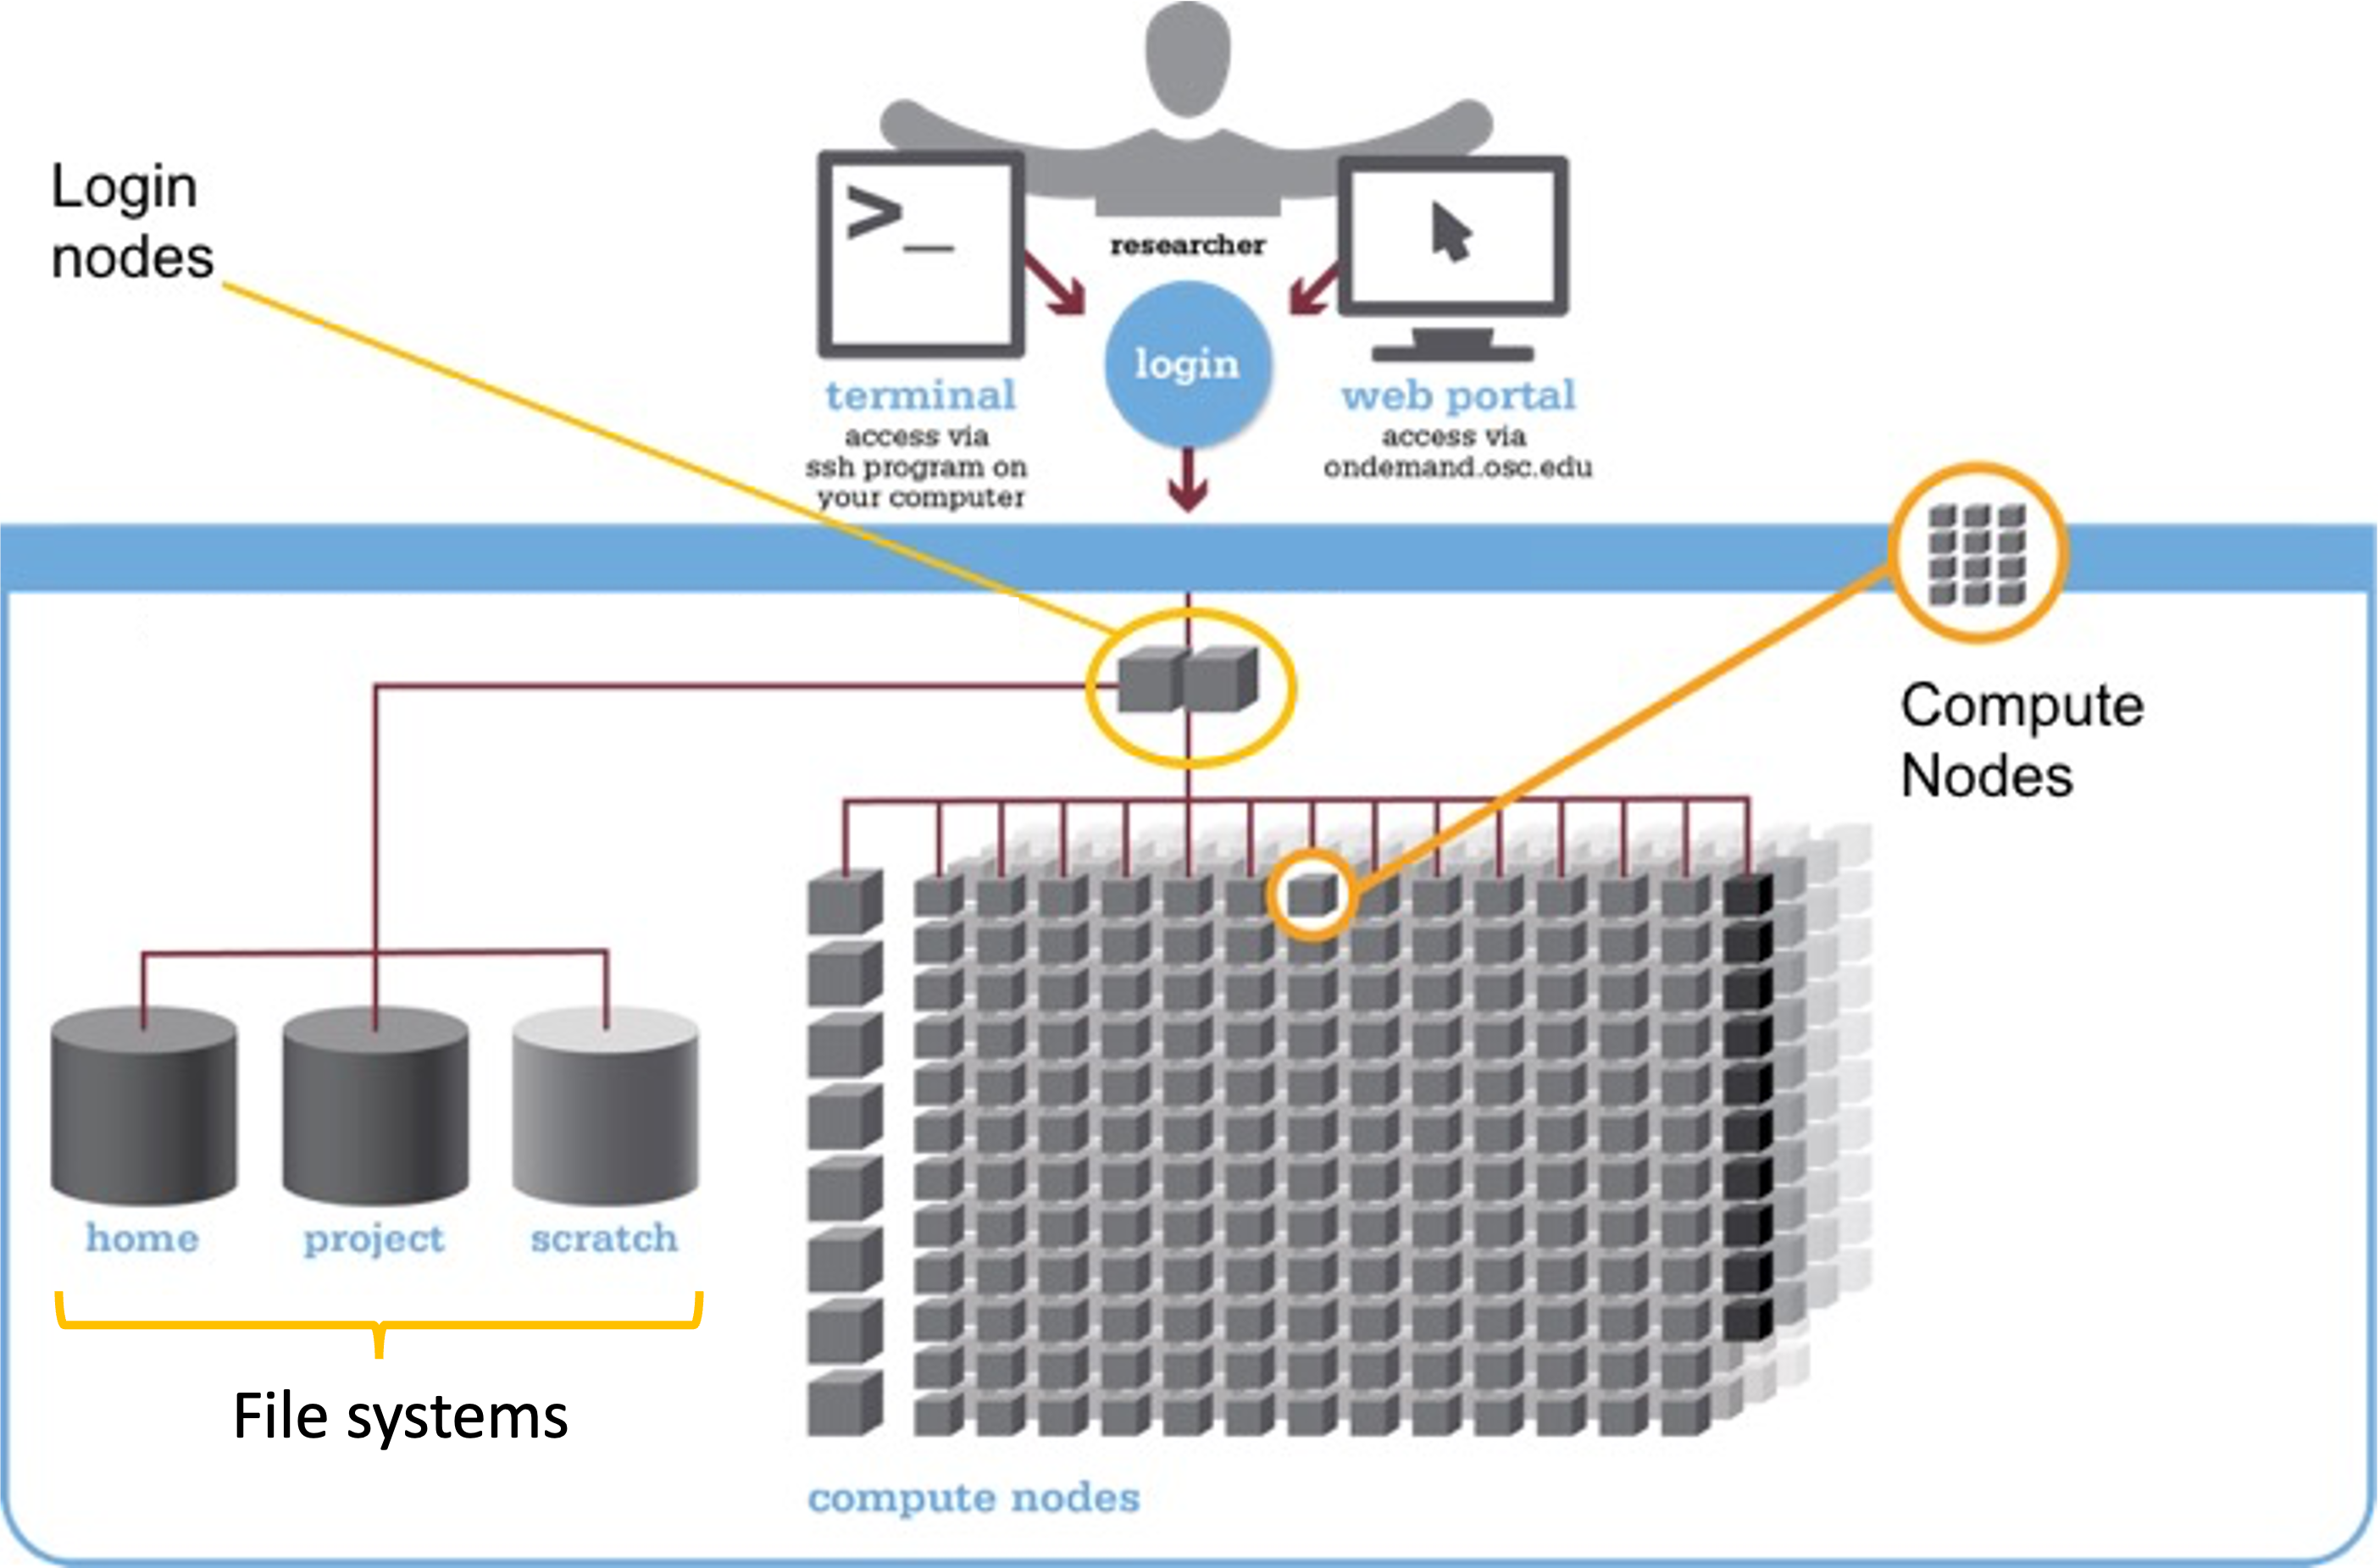
We can think of a supercomputer as having three main parts:
- File Systems: Where files are stored (these are shared between the two OSC supercomputers!)
- Login Nodes: The handful of computers everyone shares after logging in
- Compute Nodes: The many computers you can reserve to run your analyses
File systems
While OSC has several distinct file systems, we will only be working in a so-called “project directory” (with directory meaning folder) for our workshop’s OSC Project, PAS2714, at: /fs/ess/PAS2714.
| File system | Located within | Quota | Backed up? | One for each… |
|---|---|---|---|---|
| Home | /users/ |
500 GB / 1 M files | Yes | User |
| Project | /fs/ess/ |
Flexible | Yes | OSC Project |
| Scratch | /fs/scratch/ |
100 TB | No | OSC Project |
Login nodes vs. compute noes
Login nodes an initial landing spot for everyone who logs in to a supercomputer. There are only a handful of them on each supercomputer, they are shared among everyone, and cannot be “reserved”. As such, login nodes are meant only to do things like organizing your files and creating scripts, and are not meant for any serious computing.
Data processing and analysis is done on compute nodes. You can only use compute nodes after putting in a request for resources (a “job”). One way of doing so is through the OnDemand website, as we’ll do in a minute to start a VS Code session on a compute node.
Compared to command-line computing on a laptop or desktop, a number of aspects work differently at a supercomputer like OSC:
- “Non-interactive” computing is common
It is common to write and “submit” scripts to a compute job queue instead of running programs interactively. - Login versus compute nodes
As mentioned, the nodes you end up on after logging in are not meant for heavy computing and you have to request access to “compute nodes” to run most analyses.
- Software
You generally can’t install “the regular way”, and even software that is installed software often needs to be “loaded”. - Operating system
Supercomputers run on the Linux operating system.
4 OSC OnDemand
The OSC OnDemand web portal allows you to use a web browser to access OSC resources such as:
- A file browser where you can also create and rename folders and files, etc.
- A Unix shell
- “Interactive Apps”: programs such as RStudio, Jupyter, VS Code and QGIS.
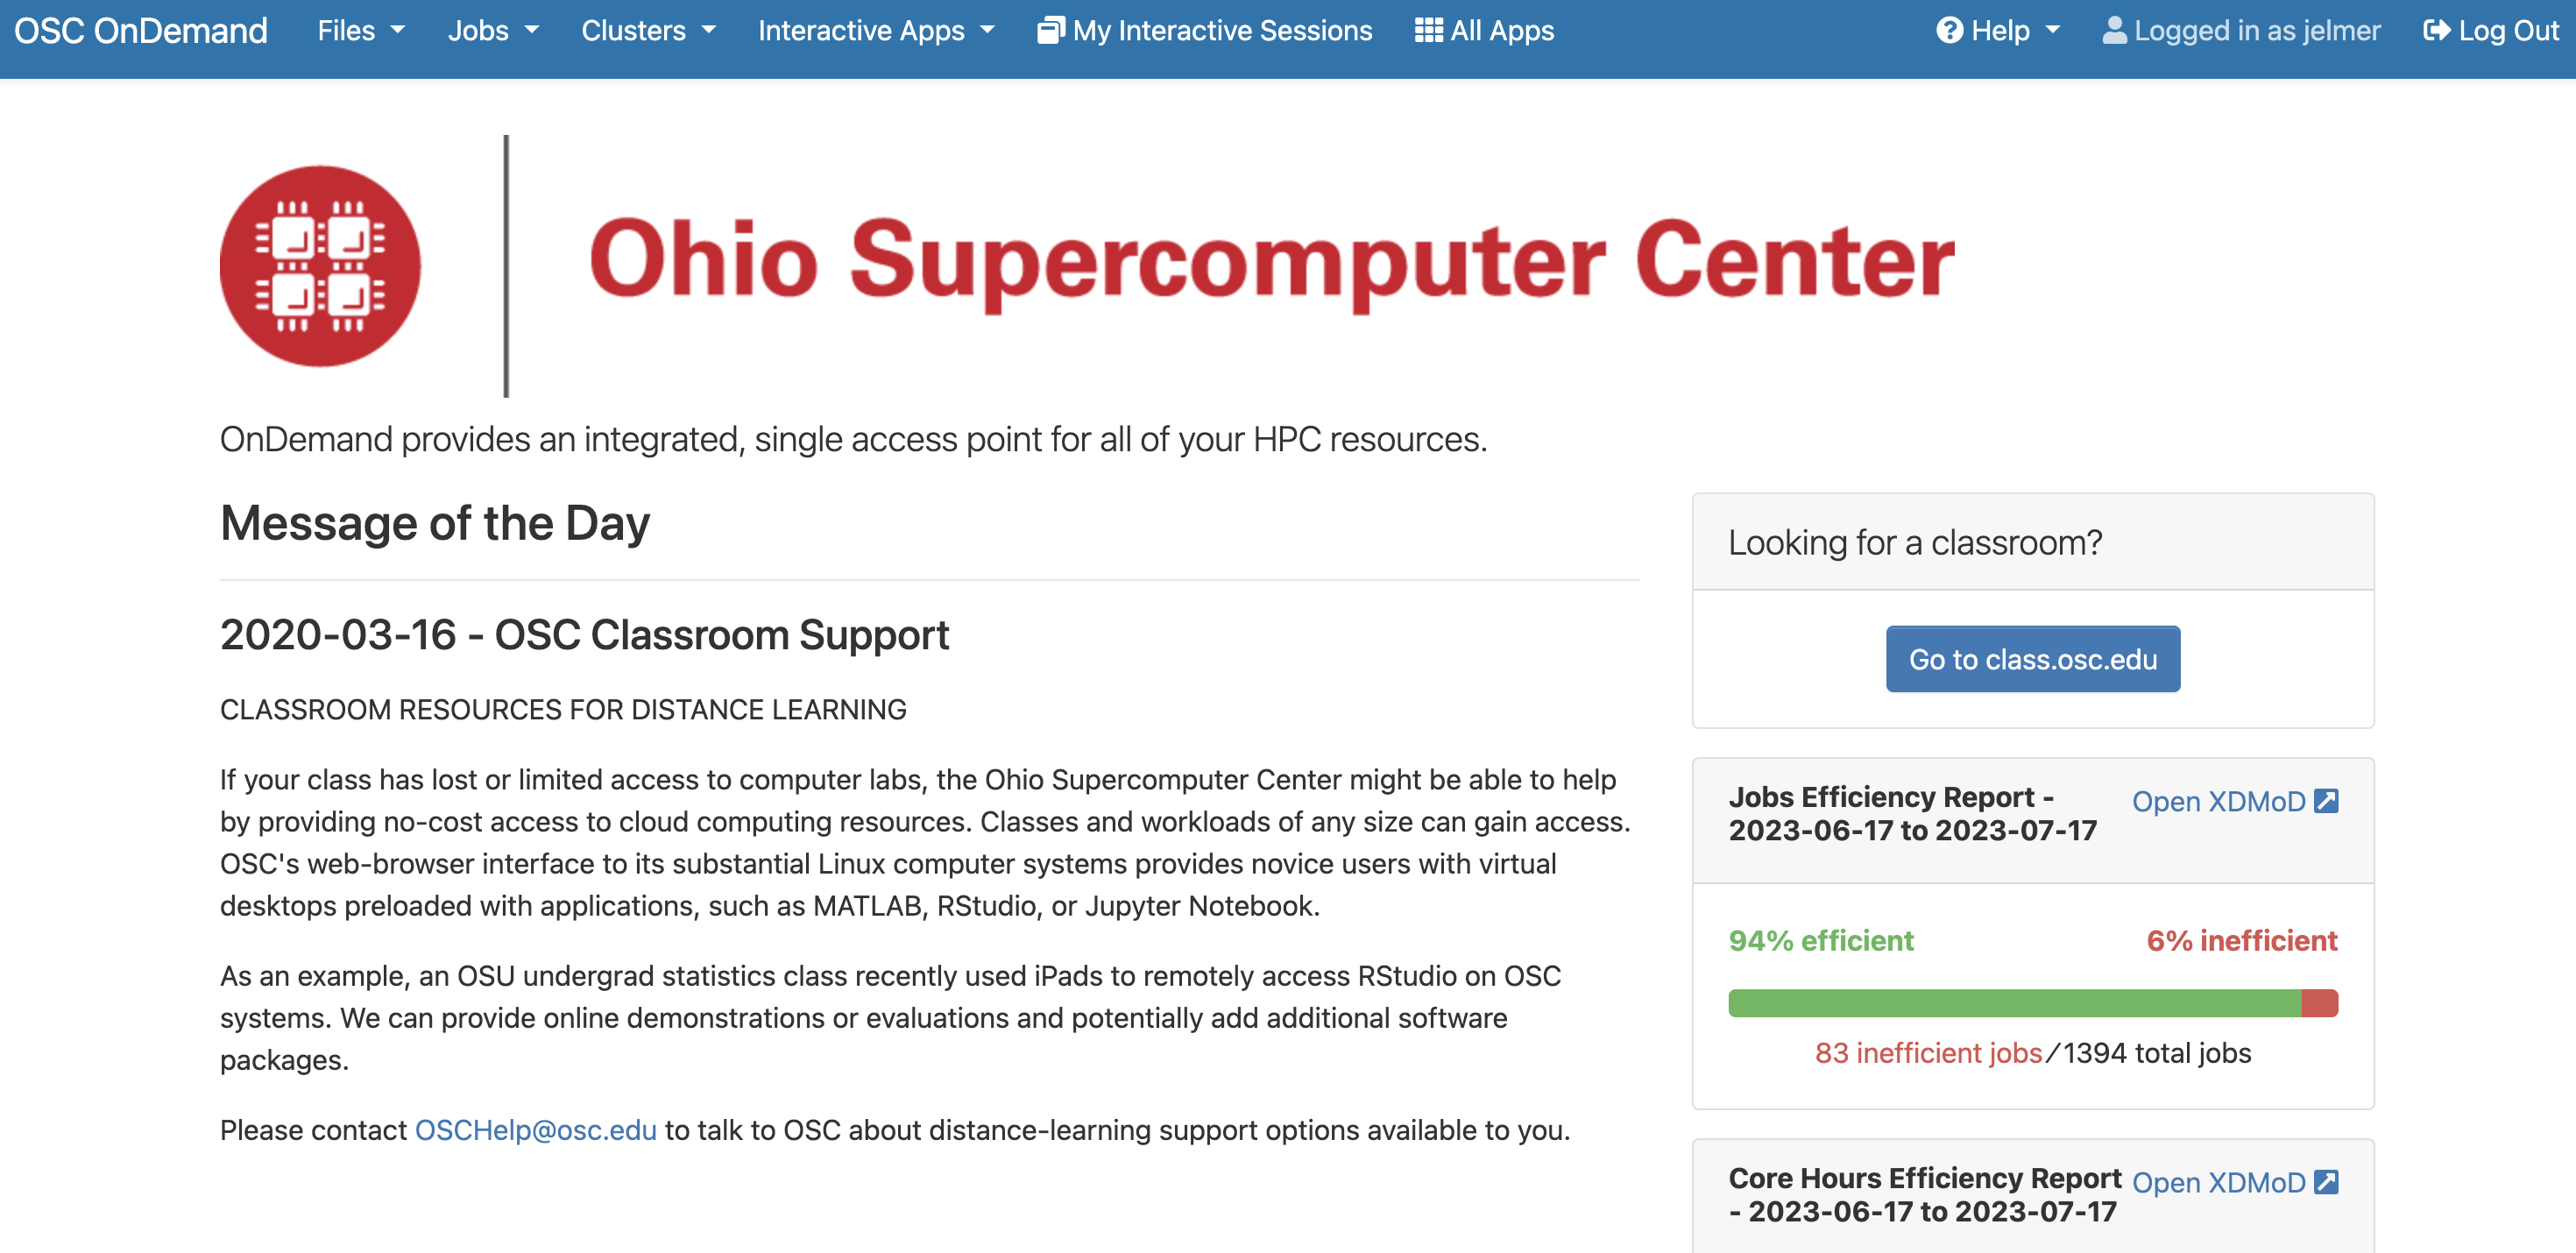
Go to https://ondemand.osc.edu and log in (use the boxes on the left-hand side). You should see a landing page similar to the one below:
We will now go through some of the dropdown menus in the blue bar along the top.
4.1 Files: File system access
Hovering over the Files dropdown menu gives a list of directories that you have access to. If your account is brand new, and you were added to PAS2714 for this workshop, you should only have three directories listed:
- A Home directory — starts with
/users/ - The
PAS2714project’s “scratch” (temporary) directory —/fs/scratch/PAS2714 - The
PAS2714project’s “project” (permanent, backed-up) directory —/fs/ess/PAS2714
You will only ever have one Home directory at OSC, but for every additional project you are a member of, you should usually see additional /fs/ess and /fs/scratch directories appear.
In the Files dropdown menu, click on our focal directory /fs/ess/PAS2714.
Once there, you should see whichever directories and files are present at the selected location, and you can click on the directories to explore the contents further:
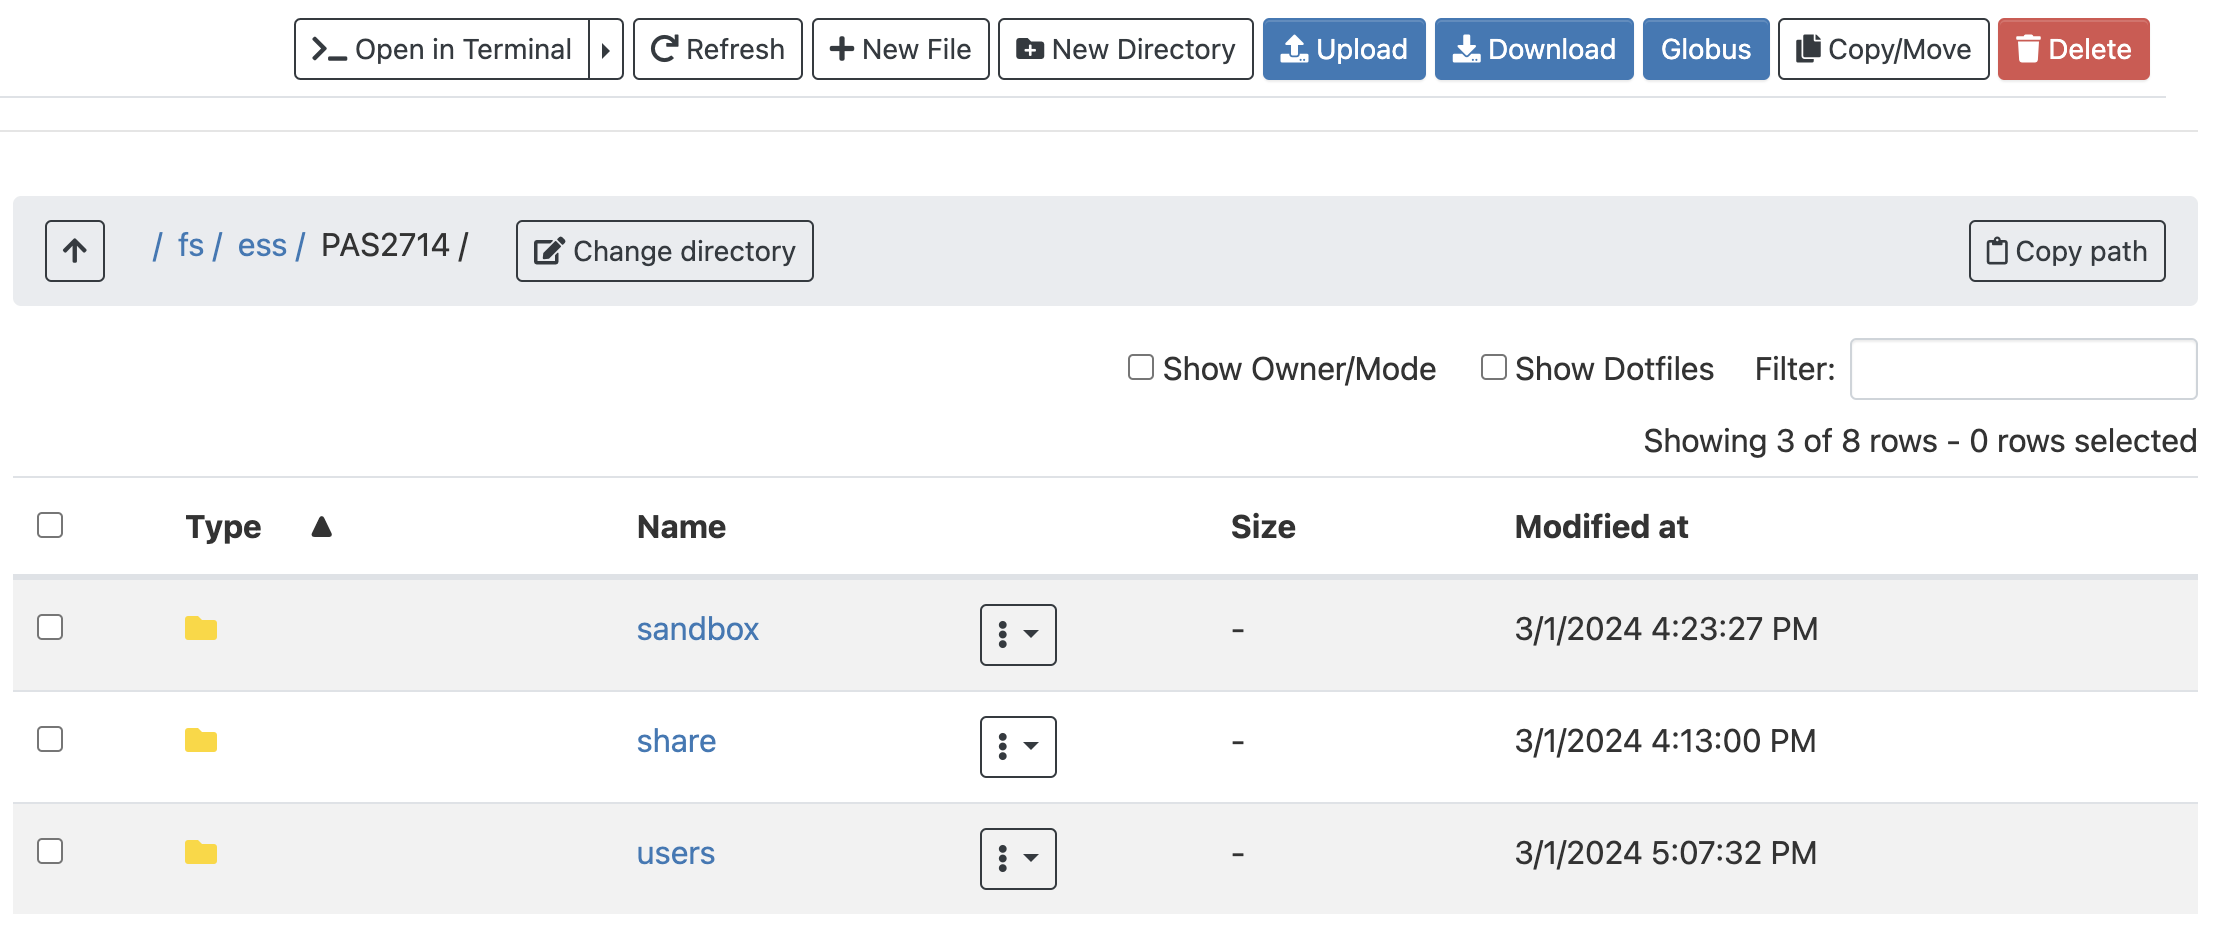
This interface is much like the file browser on your own computer, so you can also create, delete, move and copy files and folders, and even upload (from your computer to OSC) and download (from OSC your computer) files2 — see the buttons across the top.
- Click on the
usersdir in/fs/ess/PAS2714. - Create your own dir by clicking the
New Directorybutton towards the top. - Please give it the exact same name as your OSC username (also match the capitalization!).
(If you’re not sure what your username is — look at the right side of the blue top bar, “Logged in as”:)

4.2 Clusters: Unix shell access
Interacting with a supercomputer is most commonly done using a Unix shell. Under the Clusters dropdown menu, you can access a Unix shell either on Owens or Pitzer:

I’m selecting a shell on the Pitzer supercomputer (“Pitzer Shell Access”), which will open a new browser tab:

However, from now on, we’ll be accessing a Unix shell inside the VS Code text editor, which also gives us some additional functionality in a user-friendly way.
4.3 Interactive Apps
We can access programs with Graphical User Interfaces (GUIs; point-and-click interfaces) via the Interactive Apps dropdown menu:
- Select VS Code using the “Code Server” button:
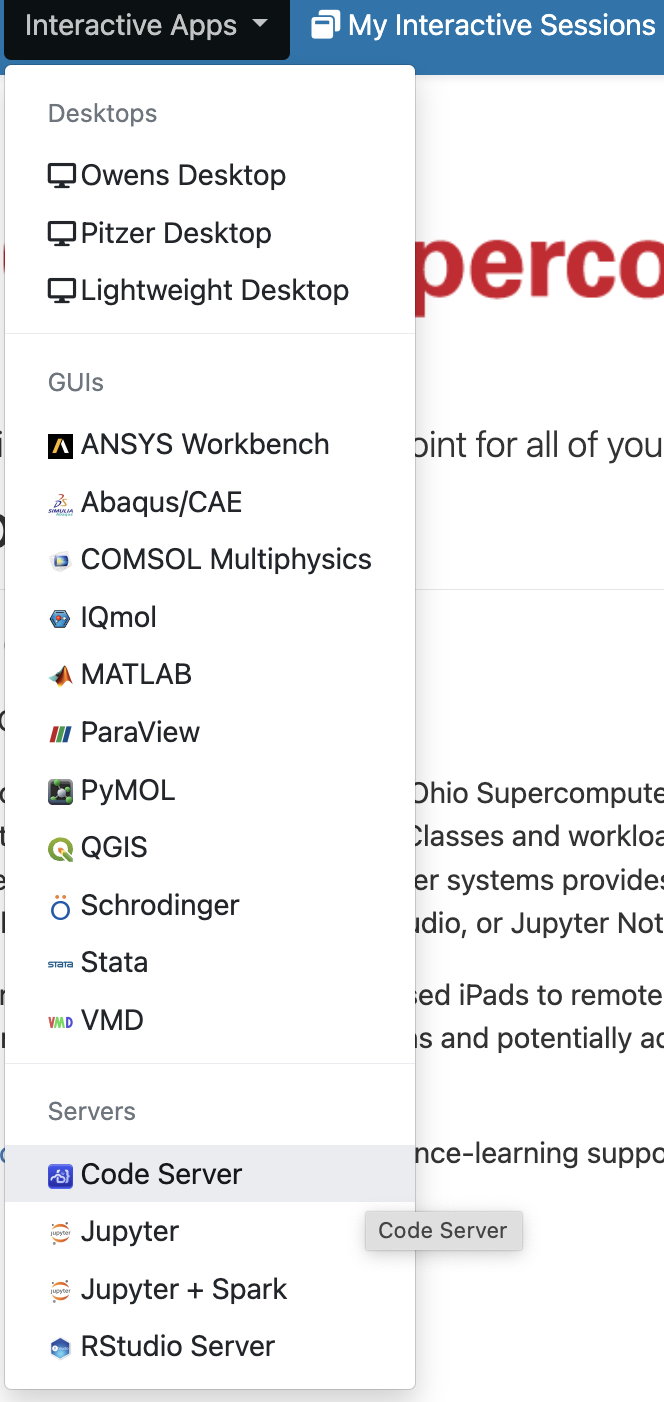
- Interactive Apps like VS Code and RStudio run on compute nodes (not login nodes). Because compute nodes always need to be “reserved”, we have to fill out a form and specify the following details:
- The OSC “Project” that we want to bill for the compute node usage:
PAS2714. - The “Number of hours” we want to make a reservation for:
33. - The “Working Directory” for the program: your personal folder
/fs/ess/PAS2714/users/<username>. - The “Codeserver Version”:
4.8(most recent).
- The OSC “Project” that we want to bill for the compute node usage:
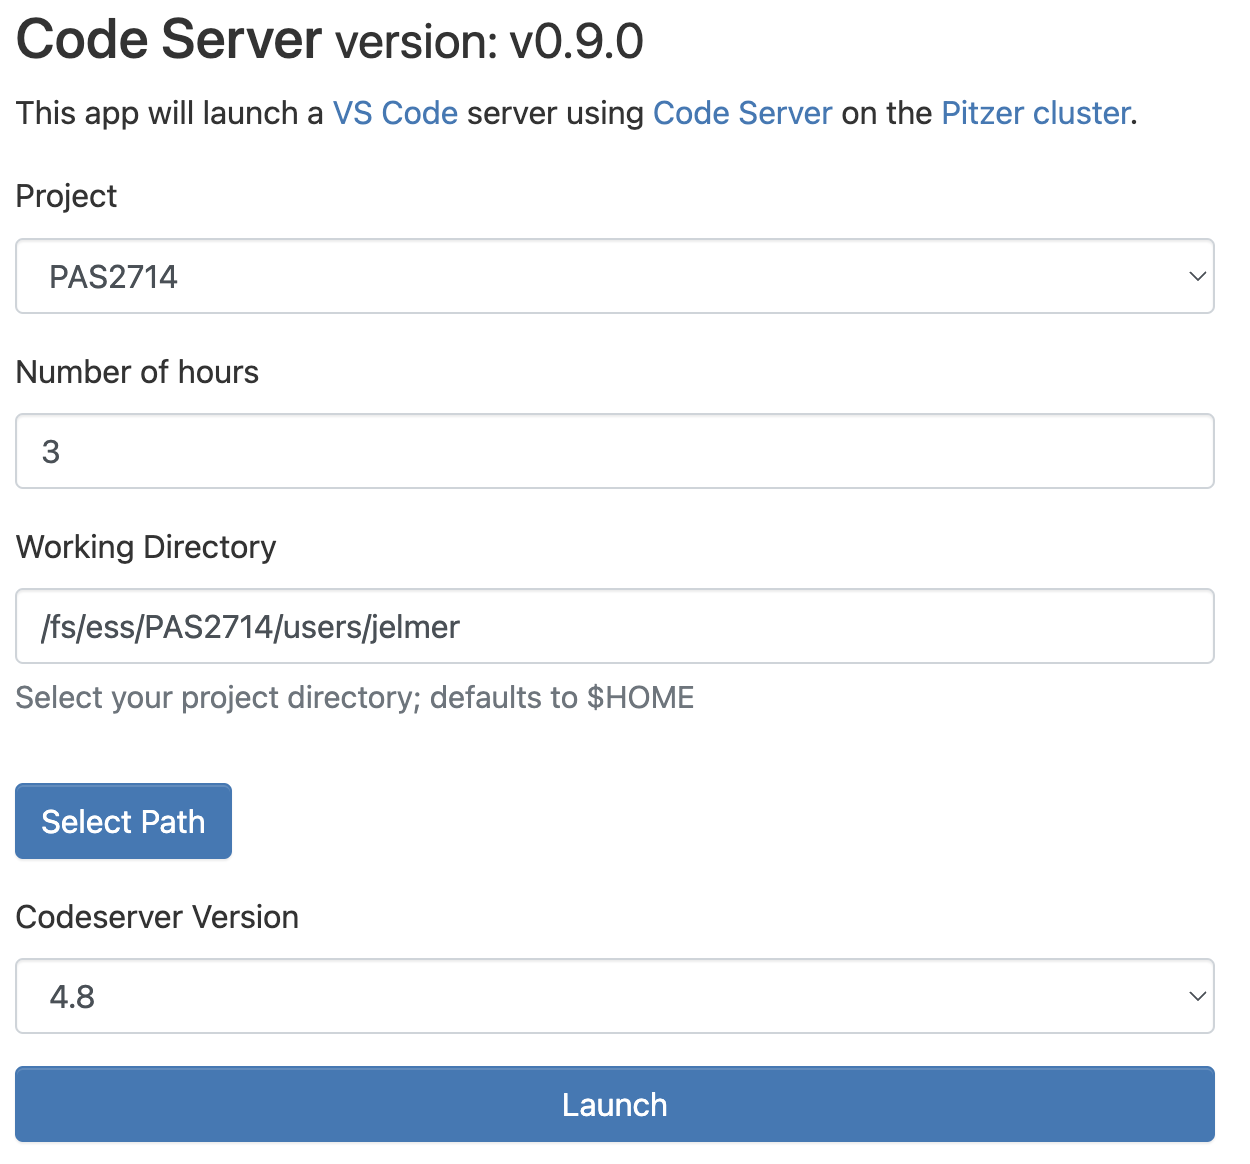
- Click on Launch at the bottom, which will send your request to the “compute job” scheduler.
- First, your job will be “Queued” — that is, waiting for the job scheduler to allocate compute node resources to it:
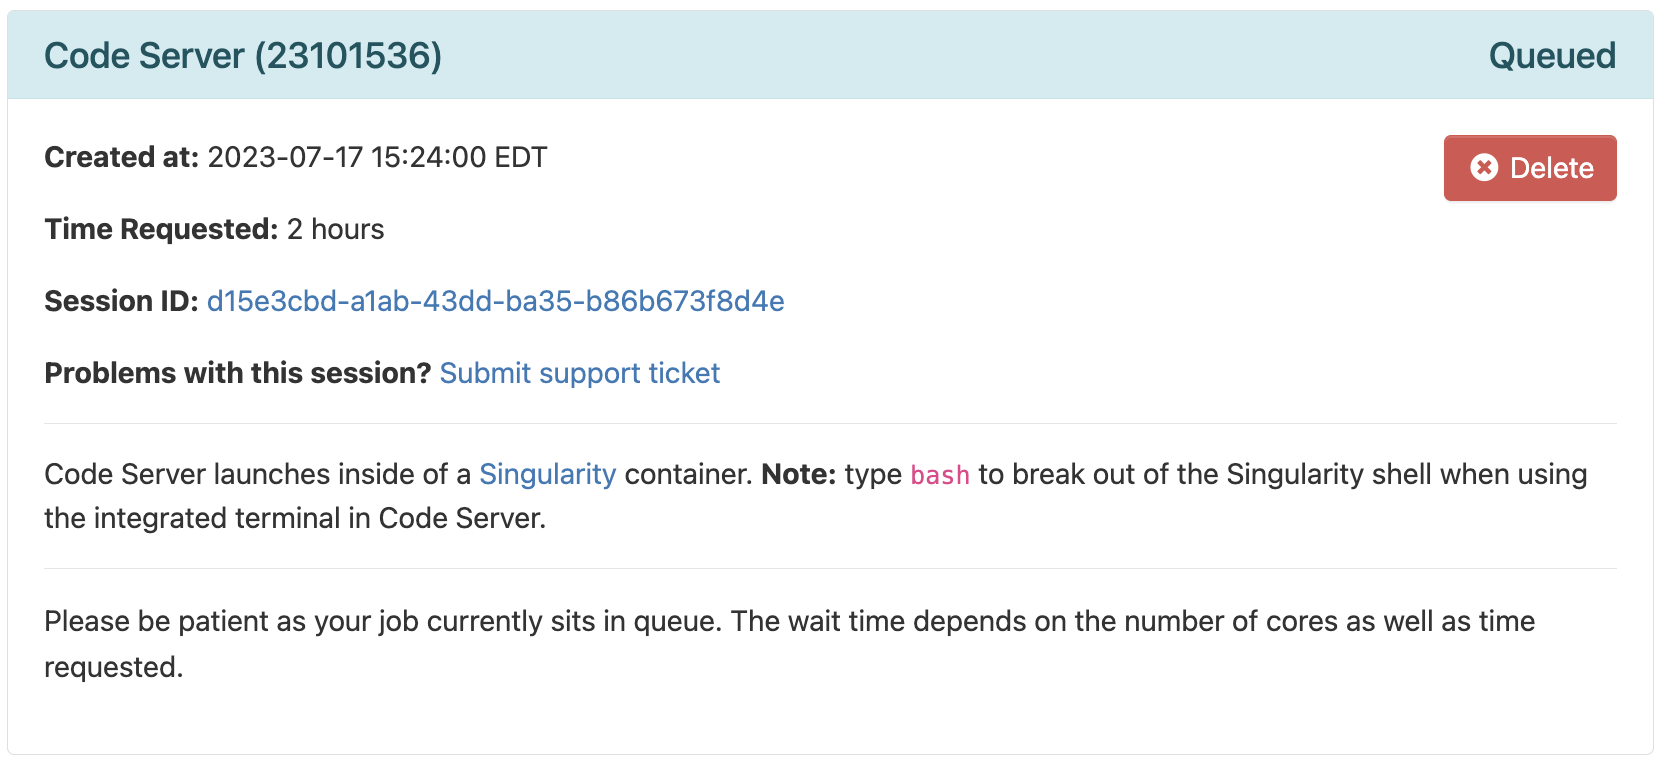
- Your job is typically granted resources within a few seconds (the card will then say “Starting”), and should be ready for usage (“Running”) in another couple of seconds:
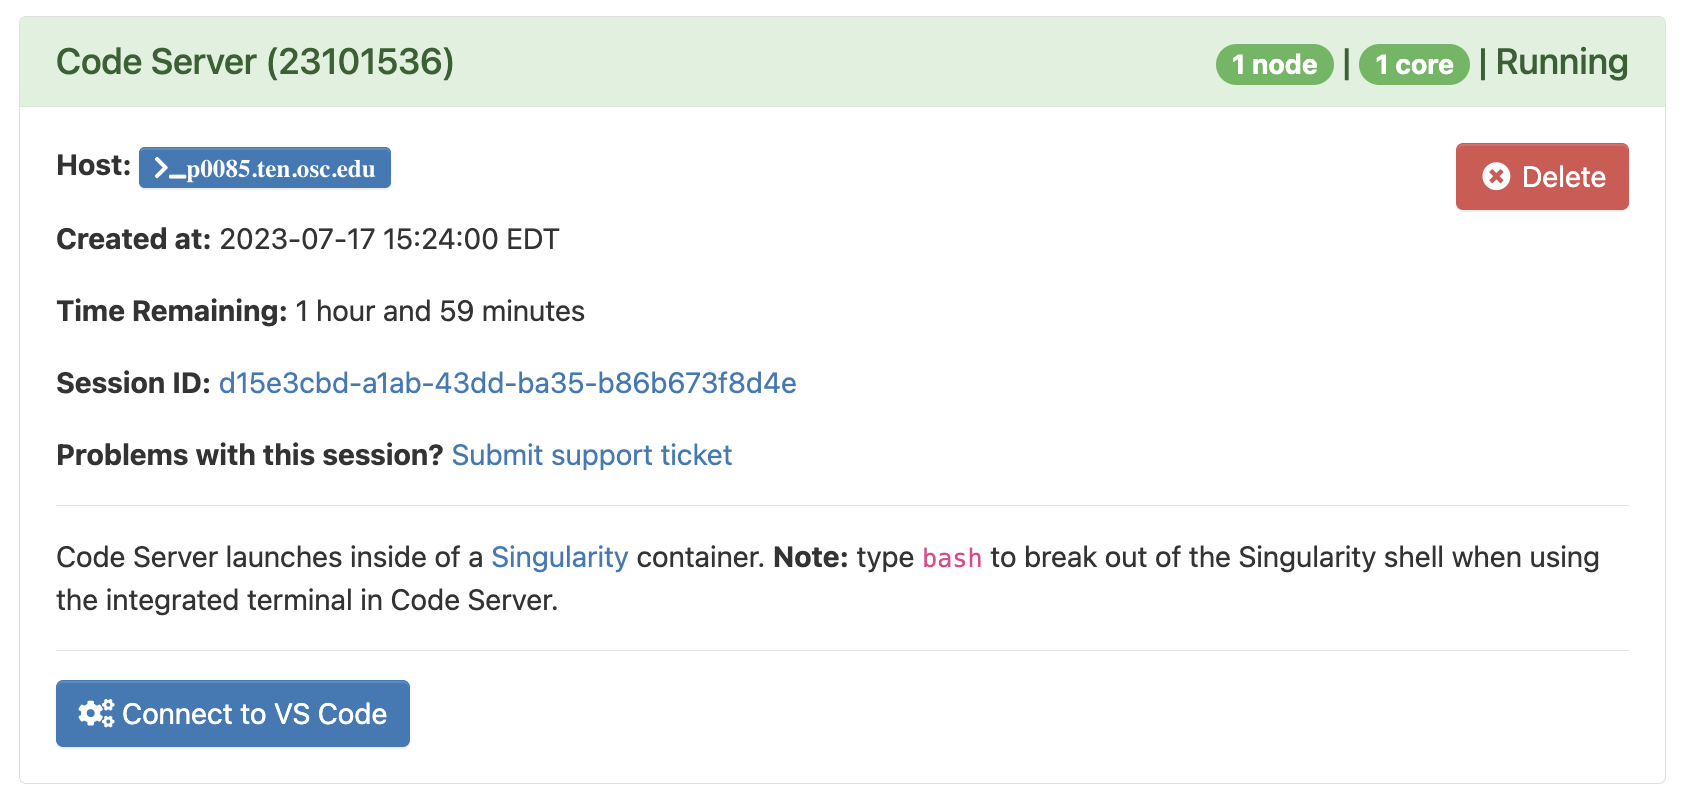
- Once it appears, click on the blue Connect to VS Code button to open VS Code in a new browser tab.
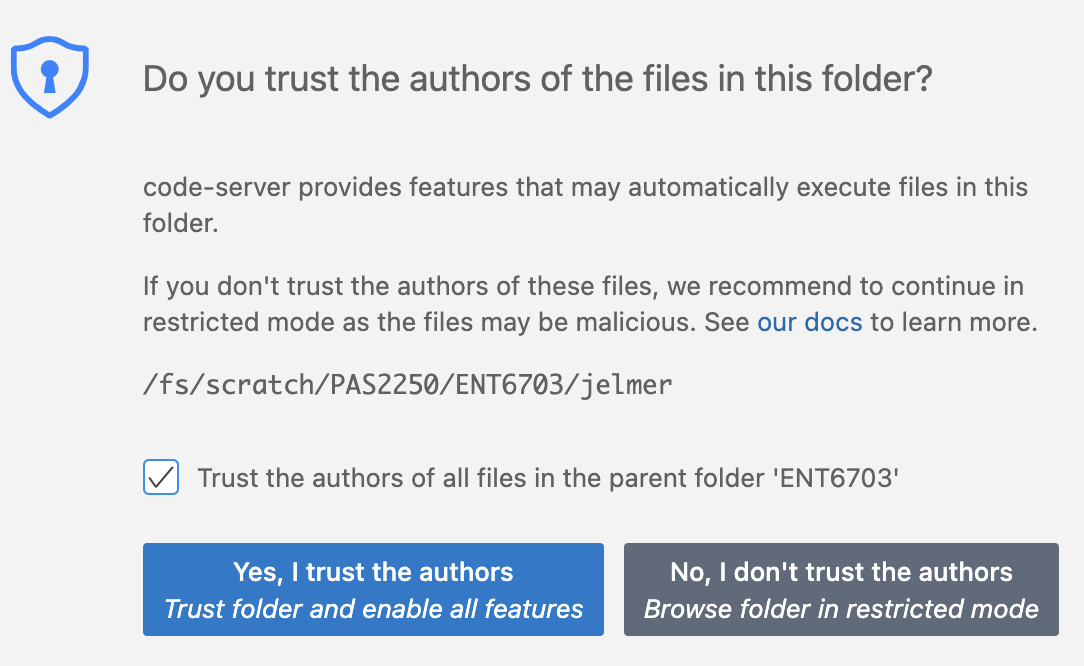
- When VS Code opens, you may get these two pop-ups (and possibly some others) — click “Yes” (and check the box) and “Don’t Show Again”, respectively:

5 VS Code
5.1 What is VS Code?
VS Code (Visual Studio Code, AKA “Code Server”) is basically a fancy text editor. To emphasize the additional functionality relative to basic text editors like Notepad and TextEdit, editors like VS Code are also referred to as “IDEs”: Integrated Development Environments. The RStudio program is another good example of an IDE. For our purposes:
- VS code will be our IDE for Unix shell code.
- RStudio will be our IDE for R.
5.2 The VS Code User Interface
Side bars
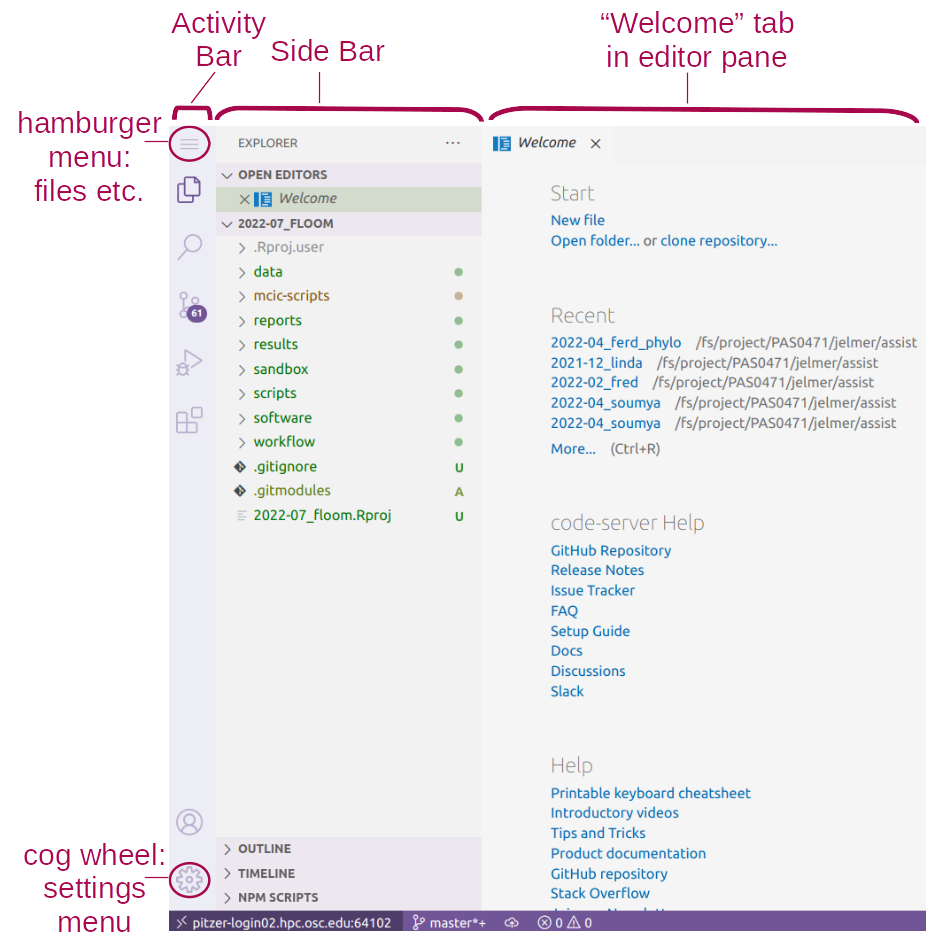
The Activity Bar (narrow side bar) on the far left has:
- A (“hamburger menu”), which has menu items like
Filethat you often find in a top bar. - A (cog wheel icon) in the bottom, through which you can mainly access settings.
- Icons to toggle (wide) Side Bar options — but we’ll only use the default selection, the Explorer (file browser)
Editor pane
The main part of VS Code is the editor pane, where we can open files like scripts and other text files, and images.
Terminal (with a Unix shell)
Open a terminal by clicking => Terminal => New Terminal.
Exercise: Try a few color themes
- Access the “Color Themes” option by clicking =>
Color Theme. - Try out a few themes and see pick one you like!
5.3 A folder as a starting point
Conveniently, VS Code takes a specific directory as a starting point in all parts of the program:
- In the file explorer in the side bar
- In the terminal
- When saving files in the editor pane.
(If you need to switch folders, click => File => Open Folder.)
Resizing panes
You can resize panes (the terminal, editor, and side bar) by hovering your cursor over the borders and then dragging.The Command Palette
To access all the menu options that are available in VS Code, the so-called “Command Palette” can be handy, especially if you know what you are looking for. To access the Command Palette, click and thenCommand Palette(or press F1 or Ctrl/⌘+Shift+P).Keyboard shortcuts
For a single-page PDF overview of keyboard shortcuts for your operating system: =>Help=>Keyboard Shortcut Reference. (Or for direct links to these PDFs: Windows / Mac / Linux.) A couple of useful keyboard shortcuts are highlighted below.
Further reading
OSC’s learning resources
- An extended version of this introduction
- OSC’s online asynchronous courses
- OSC’s new User Resource Guide4
Footnotes
Or Python.↩︎
Though this is not meant for large (>1 GB) transfers. Different methods are available but are beyone the scope of this introduction.↩︎
Note that we’ll be kicked off as soon as that amount of time has passed!↩︎
Attribution: This page uses material from an OSC Introduction written by Mike Sovic and from OSC’s Kate Cahill Software Carpentry introduction to OSC.↩︎